How to Calibrate Coffee Water Temperature: 2026 Guide
Table of Contents
- How to Calibrate Coffee Water Temperature: Step-by-Step
- How to Measure Coffee Water Temperature Accurately
- The Best Water Temperature for Coffee by Roast Level
- Coffee Maker Temperature Adjustment: PID, Setpoint, and Offsets
- Coffee Brewing Temperature and Extraction: Reading the Shot
- Common Mistakes When Calibrating Brew Temperature
- Water Chemistry and Altitude: What Changes Your Boiling Point
- Conclusion
- Frequently Asked Questions
Last Updated: October 5, 2026
How to Calibrate Coffee Water Temperature: Step-by-Step
Water that reads 200°F on the display is not always 200°F at the coffee bed. That gap is where good shots go to die.
At Iron Soldiers Coffee Company, we talk to plenty of daily brewers who have never checked whether their machine tells the truth.
Below is the full drill, step by step. Most of it takes under half an hour.
Key Takeaway
A machine's displayed temperature is a sensor reading, not a promise. Calibration closes the gap between what the screen says and what actually hits the grounds.
What You'll Need Before You Start
Gather your gear before you touch any settings. A short checklist keeps the process repeatable:
- A fast-read digital thermometer with a thin probe
- Distilled water for the ice bath
- Ice cubes
- A small cup or pitcher
- Your machine's manual, for the offset or PID menu
- A notebook or phone for logging readings
Two notes on the thermometer. Resolution matters: a unit reading to 0.1°F tells you more than one jumping in whole degrees. But accuracy is not resolution, a thermometer can show tenths and still be two degrees off. That is why we test it first.
Step 1: Verify Your Thermometer with an Ice-Water Bath
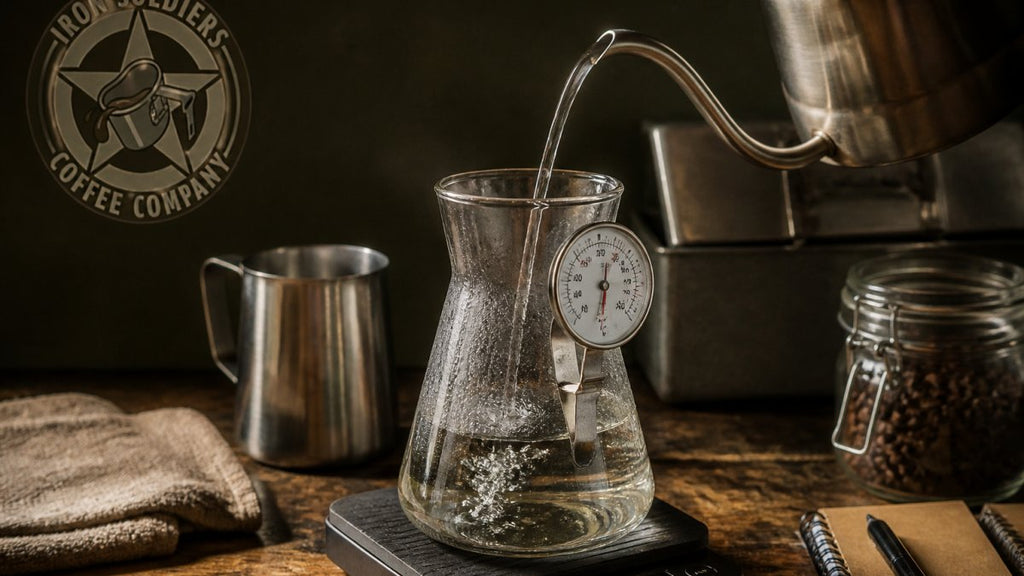
An ice-water bath is the field-standard reference point and simple to build.
A correct reading sits at 32°F. Within a degree, the probe is trustworthy. If it is off by more, note the gap and subtract it from every later reading.
Why distilled water? Minerals and impurities shift how the mixture behaves; distilled gives the cleanest, most repeatable reference.
Watch Out
Do not skip the stir. A fresh ice bath can sit several degrees warmer at the top than at the bottom, which sends your whole calibration off before you have started.
Step 2: Measure Brew Water at the Group Head or Kettle
Where you measure changes what you learn. The kettle tells you what you pour; the group head tells you what the coffee actually meets.
For pour-over, check the kettle right off the heat, then again after the first pour. For espresso, place a room-temperature cup under the group head and run a shot with no coffee in the basket, reading the water as it collects.
Take three readings and write them down. Consistency between runs matters more than any single number.
Step 3: Adjust the PID Offset and Re-Test
Most PID machines let you apply an offset, a correction added to the sensor's reading.
Change one variable at a time, run the same measurement drill, and compare. If the gap closes, you are done. If it widens, back the offset off and check sensor placement.
Log every change with the date. Machines drift, and a written record turns a mystery into a maintenance schedule.
How to Measure Coffee Water Temperature Accurately
Accuracy comes from method, not spending. Measure where water meets coffee, use a fast probe, and repeat the reading enough to trust it.
Where to Measure, and Why It Changes the Answer
Every measurement point tells a different story:
- Kettle interior: shows what you are pouring, but ignores heat lost in the air and in the vessel.
- Kettle spout or pour stream: closer to reality, but the thin stream cools fast and the probe is hard to hold steady.
- Brew bed (pour-over): the temperature the grounds actually see, which is the number that matters.
- Group head outlet (espresso): the water temperature at the puck, before it meets coffee.
- Collected cup: the average of the whole shot, useful for spotting drift but not for instant feedback.
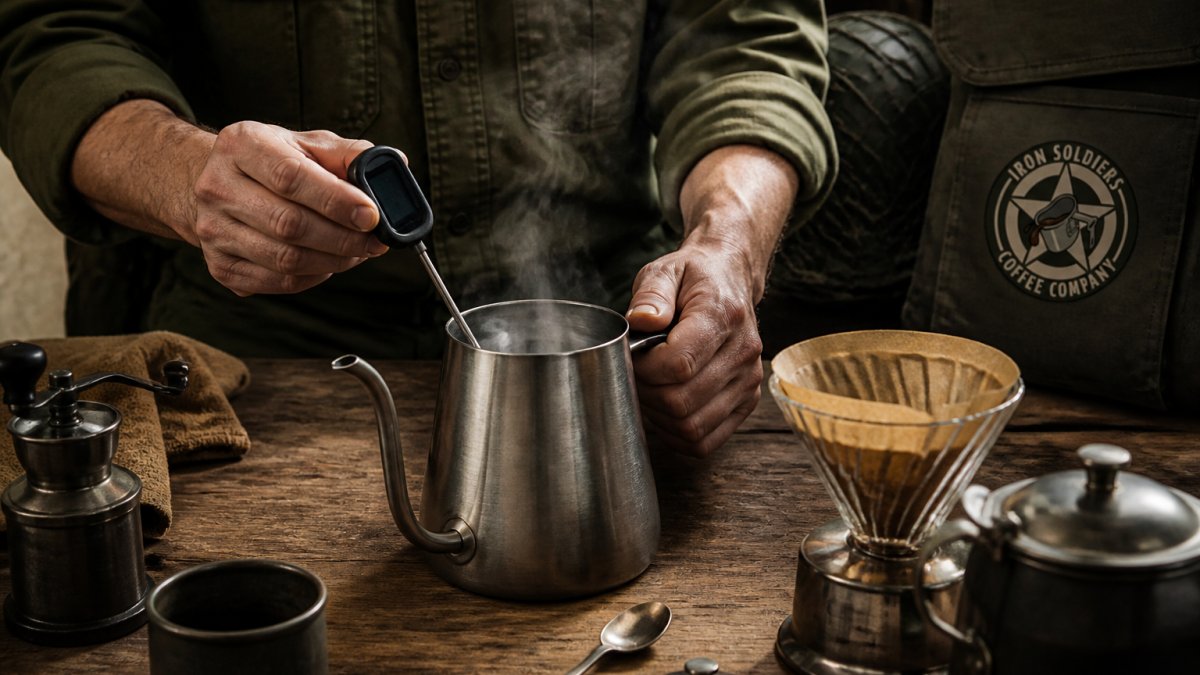
For pour-over, the most useful reading comes with the probe held in the slurry at the center of the coffee bed, about half an inch deep, during the pour. For espresso, run a shot with no coffee in the basket into a preheated cup and read the stream as it exits the group.
The Measurement Protocol
- Preheat your cup or vessel so it does not steal heat from the sample.
- Insert the probe to the same depth every time, mark it with tape if you need a reference.
- Wait for the reading to stop climbing before recording.
- Take three readings and average them.
- Note the ambient room temperature alongside the result.
A thermocouple responds faster than most consumer probes, which matters when chasing a moving target like kettle water. Slower sensors lag and read low on the way up; a probe taking eight seconds to settle will under-report a twenty-second pour.
Accounting for Probe Response Time
Probe response time is the delay between a temperature change and the sensor reporting it. Estimate yours at home: plunge the probe into an ice bath, start a timer, and note how many seconds pass before the reading stops falling. That is your practical lag. If it exceeds a few seconds, your pour readings will trail reality, slow the pour or accept a wider uncertainty band.
Quantifying Uncertainty
No home thermometer is exact. Assume a consumer-grade digital probe is accurate to within one or two degrees after an ice-point check, less if unchecked. A 200°F reading might really be 198°F or 202°F.
The National Institute of Standards and Technology guidance on thermometer calibration is a useful reference if you want to understand how reference points and uncertainty work. You do not need lab-grade gear.
Pro Tip
Log the probe model, the ice-point result, and the ambient temperature with every session. When a reading looks wrong six months from now, that log tells you whether the machine drifted or the thermometer did.
The Best Water Temperature for Coffee by Roast Level
The best water temperature for coffee lands between 195°F and 205°F for most brewing. Within that band, roast level decides where you sit.
Lighter roasts are denser and less soluble, so they reward more heat. Medium roasts sit in the middle.
| Roast Level | Target Range | Why It Works |
|---|---|---|
| Light | 200-205°F | Higher heat pulls full extraction from dense beans |
| Medium | 197-202°F | Balanced range for even extraction |
| Dark | 195-199°F | Lower heat avoids over-extraction and bitterness |
Start in the middle of your roast's range, then move in one-degree steps. Small moves beat big swings.
Coffee Maker Temperature Adjustment: PID, Setpoint, and Offsets
A PID controller holds a setpoint, the target temperature you choose.
If your machine brews cool, raise the setpoint a degree or two and re-measure.
Machines without a PID have less control. Kettles lose heat the moment they leave the burner, so preheat your vessel and work quickly.
Water chemistry and altitude both shift your boiling point, which changes how much headroom you have. We cover that further down.
Coffee Brewing Temperature and Extraction: Reading the Shot
Coffee brewing temperature and extraction are directly linked. Hotter water dissolves more; cooler water dissolves less. Your taste buds are the final gauge.
Signs your water is too hot:
- Sharp, bitter, or ashy notes
- A dry, lingering finish
- Thin body despite a fine grind
Signs your water is too cool:
- Sour, salty, or grassy flavors
- Weak color and thin mouthfeel
- A short finish that fades fast
Change temperature before grind size. Grind is a bigger hammer, and reaching for it first makes it hard to tell which variable fixed the shot.
Pro Tip
Log taste notes next to your temperature readings. After a few sessions you will spot your machine's sweet spot faster than any chart can tell you.
Common Mistakes When Calibrating Brew Temperature
The biggest mistake is measuring in the wrong place. A kettle reading tells you nothing about the water at the coffee bed, where extraction actually happens.
Other traps we see often:
- Trusting a thermometer that was never ice-bath tested
- Changing temperature and grind size in the same session
- Taking one reading and calling it done
- Ignoring scale buildup, which insulates the heater and skews recovery
- Forgetting that a cold cup steals heat from every sample
Each adds error you cannot see. Fix them one at a time.
Watch Out
Scale buildup on the heater and sensor is the quiet killer of temperature control. If your machine has drifted and offsets no longer hold, descale before you chase the numbers further.
Water Chemistry and Altitude: What Changes Your Boiling Point
Water boils at a lower temperature as elevation climbs, shrinking your usable brewing range. At sea level, water boils at 212°F, leaving twelve degrees between a rolling boil and your 200°F target.
That has a direct calibration consequence: if your kettle cannot reach target without boiling, accept a lower brew temperature, extend brew time, or grind finer to compensate. A PID offset will not help, the limit is physics, not the sensor.
Reading Your Local Boiling Point
Measure your own boiling point instead of guessing from a chart. Bring distilled water to a rolling boil, hold the probe in the center of the pot without touching the bottom, and record the highest stable reading. That is your ceiling. Subtract your target brew temperature to see your real headroom.
If the margin is under five degrees, work carefully: small kettle movements, a preheated vessel, and a lid between pours.
Water Chemistry and Sensor Behavior
Water chemistry matters too. Very soft water can read differently than hard water in the same kettle, and heavy mineral content encourages the scale that throws your heater off.
A simple field check: boil the same volume of distilled and tap water in the same kettle, and compare time to a rolling boil. A large difference points to mineral load or scale, descale next.
Pressure, OPV, and the Temperature Relationship
For espresso, pressure and temperature work together. The OPV sets brew pressure, commonly around 9 bar, and a blind basket tests pressure without coffee in the way. If pressure is far off, group-head temperature readings get harder to interpret, because flow rate changes how long water contacts the heater. Calibrate pressure first, then temperature.
Watch Out
At high elevation, do not chase a target temperature your water cannot reach. Adjust grind, ratio, or brew time instead, and log the change so you can repeat it.
Conclusion
Temperature control separates a good cup from a great one, and it starts with honest measurement.
Iron Soldiers Coffee Company roasts fresh coffee for people who take their daily brew seriously, and $1 from every bag goes to a volunteer-only nonprofit supporting veterans and their families.
Get started with Iron Soldiers Coffee Company and brew every cup with the same precision you bring to the rest of your day.
Frequently Asked Questions
What is the perfect water temperature for coffee?
The Specialty Coffee Association recommends brew water between 195°F and 205°F (90.5°C to 96°C). Within that band, lighter roasts usually taste best near 200-205°F, while dark roasts do better around 195-200°F. Anything below 195°F under-extracts and tastes sour; anything above 205°F scalds the grounds and adds bitterness. Verify your actual brew water temperature with a calibrated thermometer at the group head or kettle spout before trusting any machine display.
How do you calibrate coffee water temperature?
Start by verifying your thermometer in an ice-water bath: it should read 32°F. Then measure brew water at the group head or kettle, not from the machine's digital readout. Compare the reading to the setpoint. If there is a gap, enter a temperature offset in the PID (for example, -4°F) and re-test. Repeat until the measured brew water matches your target range of 195-205°F. Log each adjustment so you can trace drift over time.
Should you measure water temperature at the kettle or at the coffee grounds?
Measure at the point where water meets coffee. Kettle readings tell you the source temperature, but the water loses heat as it travels through the group head, shower screen, and air. A thermocouple placed at the brew outlet or a probe in the coffee bed captures the temperature that actually drives extraction. For pour-over, measure in the slurry. For espresso, measure at the group head with a blind basket or a Scace-style device.
How often should you check a coffee brewer's temperature?
Check monthly for home setups and weekly for high-volume or commercial machines. Scale buildup, worn heaters, and sensor drift all shift brew temperature over time. Any time you descale, change water sources, or notice a flavor change, run a fresh ice-water check and a brew-water measurement. Keep a simple log of date, measured temperature, and offset applied so you can spot trends before they ruin a batch.